
This Stage would be terrifying if you were starting from zero, but the good news is that you've quietly been preparing for this Stage along this roadmap. You've been posting weekly since Stage 1. Your social media feed knows what resonates in your niche. Your insert cards have been converting customers into followers for months, and your audience data has been collecting this whole time. Most sellers face "learn social media" as a cliff suddenly, but for you, it should only be continuing the good habits you've already built.
I have one big recommendation for this whole stage: one channel only. Not four social media platforms, not "a presence everywhere". You are only one person and as an Etsy seller, you have limited time. You'll have much better results focusing on only one channel, instead of spreading yourself too thin with four. Remember that you have your email list (built in Stage 4) which keeps and converts the customers you have. Together they finish the shape this whole roadmap: Etsy as your discovery engine and conversion machine, with an audience and traffic that belong to you.

The wrong way to choose a channel is "everyone says you have to be on X". The right way is to read the evidence you've been collecting for months, then match it against what each channel actually is. Three questions to help you make the decision:
What does your own data say? It's time to look back at what you've posted. Scroll back through your Show Your Work posts since Stage 1. Which ones get saves, comments, likes, and "where can I buy this?"
Where does your persona actually spend time? The customer you wrote in Stage 1 has habits. Gift buyers and occasion planners live on Pinterest. Community-minded buyers who want to know their maker live on Instagram.
What can you sustainably make on social media? Love talking on stories? Consider Instagram. Prefer your work to speak while you stay behind the camera? Pinterest never asks for your face. There's no hard rule, but put on your analytical glasses on, and look at the format of the popular posts in your niche.
Most Etsy sellers gravitate towards two social media channels - Instagram and Pinterest. So let's have a quick look of their general differences. Keep in mind that they are not hard rules.
Instagram is a relationship channel. It rewards presence and personality: Behind-the-scenes, stories, the maker being visibly human, which is the exact habit you've been building since Stage 1. Feedback is very fast on Instagram and people can be quite passionate, which means if you build relationships here, the followers could follow you for a long time. Its drawback: Inconsistency in engagement (some posts can blow up while others being crickets), content decays in days (unless they become viral content, then it could stay for months), traffic stays on Instagram most of the time (unless the benefit is apparent, only the hardcore fans will click your link and leave Instagram).
Pinterest is a search engine wearing a social network's clothes. Nobody's watching you. You may barely get followers on Pinterest. People are searching for ideas and saving them to their own board. But the good thing is, people on Pinterest are more ready to click the link and buy things. Pins compound: a good pin can send traffic for years, which makes Pinterest the closest thing social media has to your Etsy SEO work. And here's the quiet advantage you're carrying: your Stage 2 keyword skills transfer almost directly on Pinterest. If your niche is giftable, seasonal, home, wedding, or DIY-adjacent, Pinterest deserves testing out. Its cost: it starts slow, it's rarely a community, and it's hard to build a following on Pinterest.
Extra note for digital sellers: weigh Pinterest heavily. Printables, planners, templates, and wall art are among the best-performing product types on the platform, the search-engine nature of pins matches how digital shoppers hunt ("budget planner printable", "boho nursery art"), and your mockups are already pin-shaped. For many digital shops, Pinterest isn't one option among several; it's the obvious first channel.
Choose one. Write it down with your three reasons. The channel question comes back in Step 6 with real data behind it.
Go deeper: The Complete Instagram System and The Pinterest Traffic System (read the opening of each if you're torn, then keep whichever you choose for Steps 2 and 3)
Here's an instinct worth correcting before you set anything up: your social media profile is not a shop window. A shop window wants polish and perfection, while a social media profile wants a person. The maker accounts that pull real followings in 2026 feel less like storefronts and more like a studio with the door propped open: you can see their work and the maker behind the work.
So keep these two principles in mind:
Principle one: Clear at a glance. Someone landing on your page should know what it's about in about a second, before they read the whole profile. That clarity comes from the pieces you already own: a bio built on the simple formula of who you serve + what you make + the doorway ("Hand-poured soy candles for small-space sanctuaries. Small batches made in Melbourne"), your brand kit applied consistently in your posts so the page visually holds together, and a handle that matches your shop name.
Principle two: Unmistakably human. Once the message is clear, let the maker (you!) show. Talk to followers the way you'd talk to a friend: ask real questions in captions ("which glaze for the next batch?"), run a poll on your story, reply to comments in your own voice rather than brand-speak, celebrate the small wins with your followers. Show your face when you're comfortable, and your hands always. People follow people, and in a marketplace filling up with faceless AI shops, being a visible, chatty, opinionated human isn't just charming. It's setting yourself apart.
And two questions to ask yourself when you post anything. Does this fit what I sell? Would my target customer find this interesting? Both yes, post it. Either no, change it or skip it. Your favourite TV show doesn't pass the filter (unless you run a fandom shop, in which case it's practically product research). Keep the persona you wrote in Stage 1 in mind all the time when you're making the decision.
Toolbox: Instagram Story Highlights · Pinterest Banner Templates
Here's the truth about social media that hopefully can save sellers from burnout: You don’t need to be perfect. In fact, a lot of times, perfection doesn’t get rewarded on social media nowadays. To save you further headache, you're going to run the 5C Content Creation System:
The first C: Collect inspirations
Build a creative pool before you need one. Whenever a post stops your scroll on Instagram, Pinterest, or TikTok, save it into folders that match your brand's main topics. Your feed should have been trained to deliver exactly this material since Stage 1, so the popular stuff in your niche should already be showing up. When a batching hour arrives and your mind is blank, you open a folder of proven, engaging posts and borrow the format or get inspired by the work, but never both.
The second C: Rotate the five core content categories
Purposeful pages have these five pillars on rotation instead of posting at random: Product Showcases to highlight your items, Educational Content to inform, Behind-the-Scenes for the daily reality of making, User-Generated Content from happy buyers, and Engagement & Community posts that build the relationship. You may not need all five pillars, but having at least two or three can help your feed feel alive and balanced rather than like a catalogue. You've been slowly building most of these: behind-the-scenes is your Show Your Work habit, user-generated content is the reviews and customer photos your Stage 3 engine collects, and engagement is the friend-voice you switched on in Step 2.
(Pinterest note: the mix skews heavily to Product Showcases and Educational pins there, since Pinterest focuses on search and discovery, not conversation.)
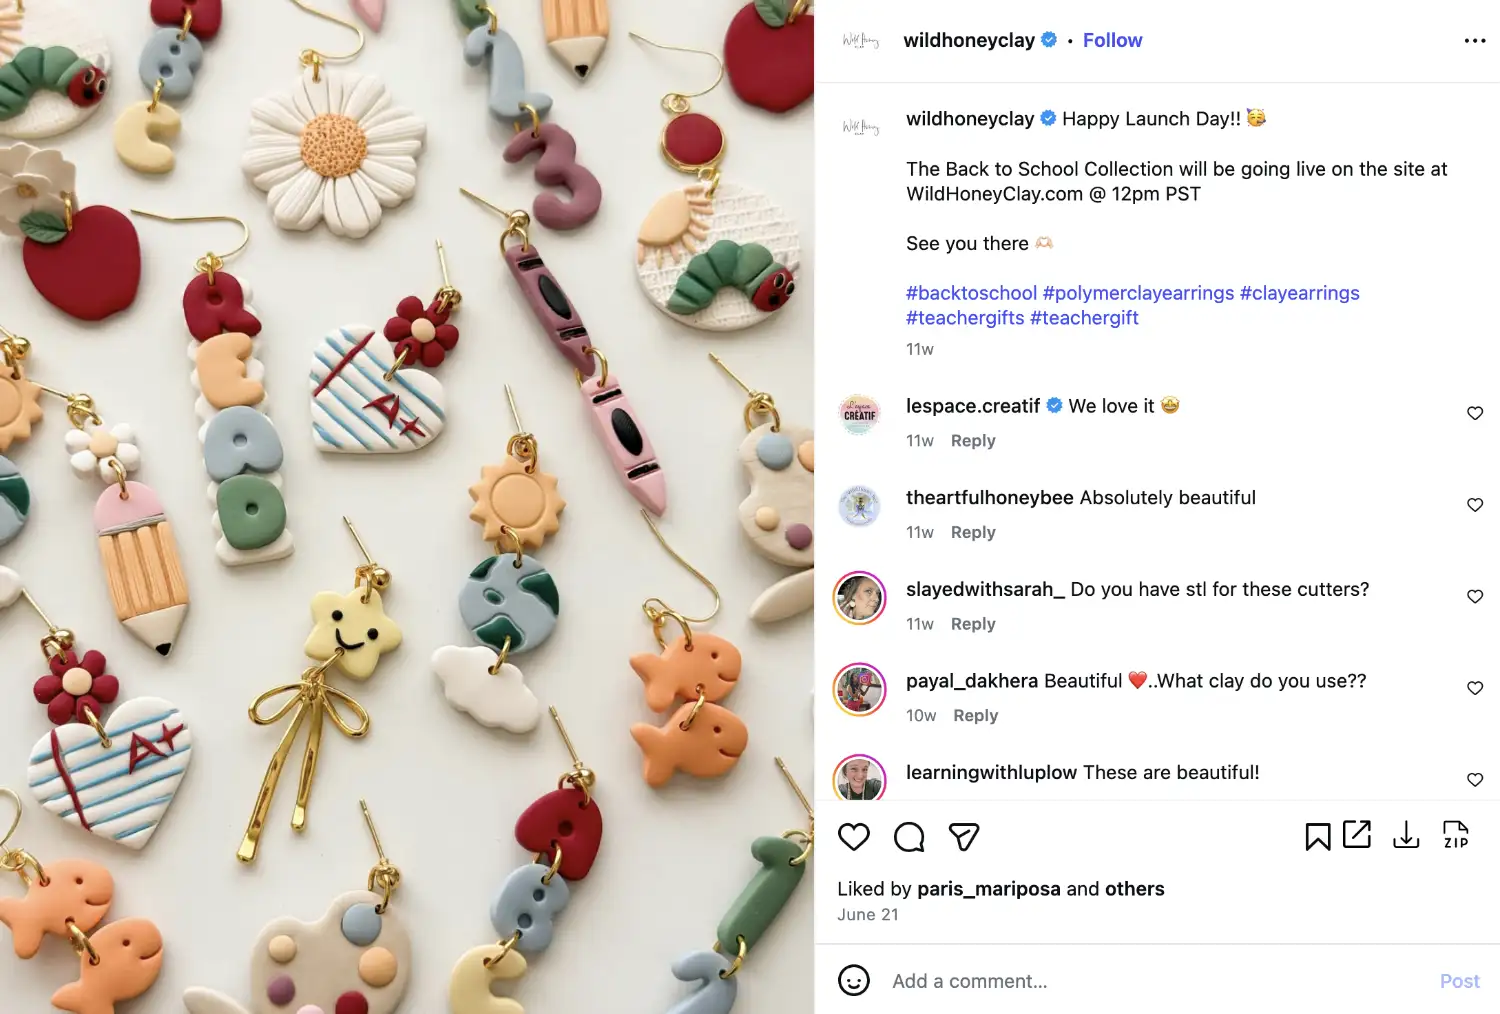
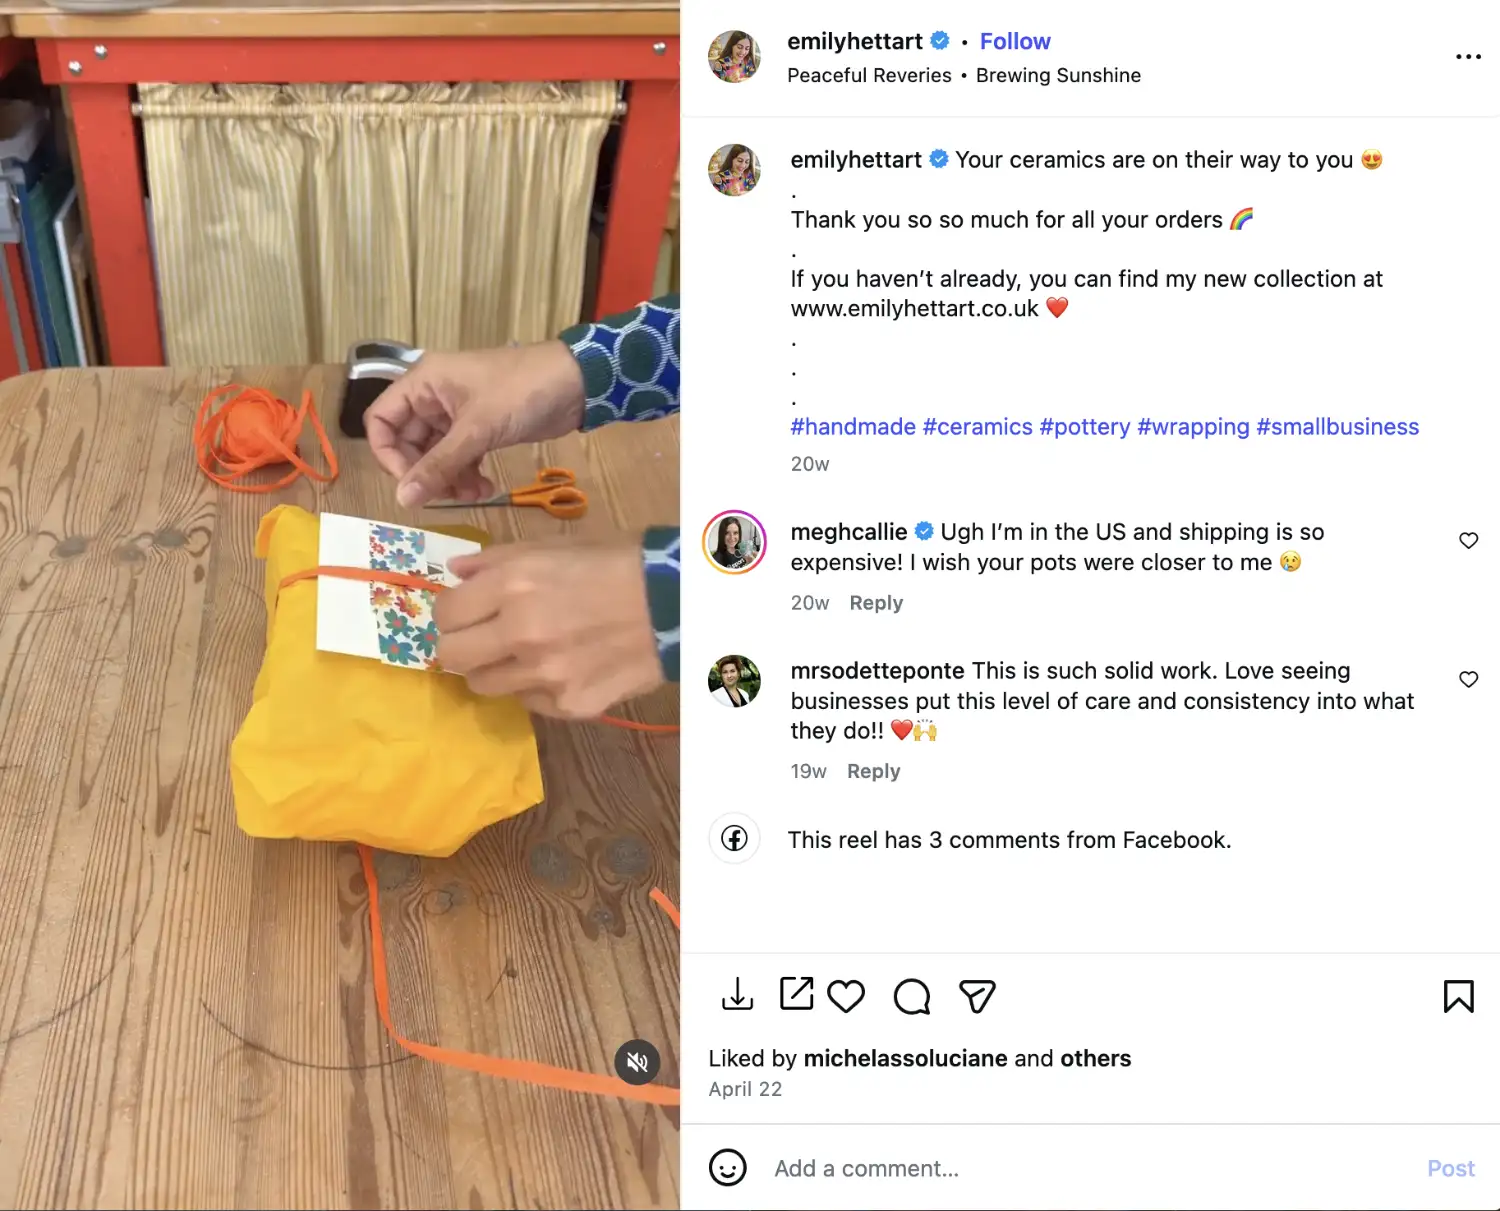
The third C: Turn categories into concrete post ideas
Each pillar becomes specific, repeatable formats: Show your items in motion or in impressive close-up detail; Teach a step-by-step styling tutorial; Share a timelapse of your crafting process, your workspace, or an order being packed; Post a glowing customer testimonial alongside the product; Run a story poll or celebrate a business milestone. Keep a running list of the formats that suit your craft, and the batching hour becomes a matter of picking from a menu. (The Instagram Playbook has the full idea bank when you need inspiring.)
The fourth C: Keep convenient ideas for busy weeks
Some weeks your life gets in the way or you get more orders than you expected. For those weeks, keep a bunch of low-effort, high-yield formats on hand: Film what you're already doing (crafting, packing orders) with a small phone tripod; Snap a clean flat-lay on a messy desk; Take a product outside for an easy video of rotating the product to show the backside; Shoot a before-and-after of raw materials versus finished piece; Screenshot a fresh review to post directly on Stories. None of these takes more than a few minutes, all of them pass the two-question filter, and you could be surprised how well these less polished content can do.
The fifth C: Capture it well with the phone you have
You don’t need to have an expensive setup to make engaging content. Your phone is more than enough if you hold to the same principles as your Stage 2 product photos. Soft, natural light to avoid harsh shadows. Clean, simple backgrounds so the subject is clear. Steady hands or a tripod for videos. Multiple shots from multiple angles so you have options, and a quick brighten in CapCut or Lightroom before posting.
Now it’s time to put this system to your calendar
The batching hour. Once a week, one sitting: pull from your first C folders and third C menu, shoot little or nothing new (your crafting sessions and photo days already produced some of the content you could edit), write the week's captions in your brand voice, and then either schedule the post on the platform or put them in a place that you can make a post from in minutes. Posting frequency targets: 3 to 4 posts a week on Instagram, or 5 to 10 pins a week on Pinterest. Your goal is to be consistent and sustainable in your content creation.
The reuse library. Here's the trick that some sellers miss: every post you make is also a template for a future post, so make sure to save them to collect them in one place as you go. If you’re using Canva, put the design into a folder every time you finish a post. Next month, the new-product announcement isn't created from scratch. Instead, you open the last one, swap the product and a few lines, and you're created a new post in minutes. The added bonus for doing this is that your content will stay more consistent visually as well.
The ten-minute engagement habit. Your social media feed is also two-way: on the popular posts in your niche, spend a few minutes an every day commenting something genuine and useful, or replying to comments with something insightful. Do this more if you’re using Instagram as you could build a community this way; on Pinterest, your time is better spent on making new pins instead.
Toolbox: Instagram Post Templates · Pinterest Pin Templates · Content System Kit
A sale is the most powerful marketing move you can make in an afternoon, and the easiest one to quietly ruin your business with. Run well, a sale creates honest urgency, clears room for new products, rewards your list, and spikes your revenue. Run carelessly, it does something much worse than costing you one month's margin: it trains your customers to never pay full price again, and that training is nearly impossible to undo. So before you run your big sale, keep these four rules in mind.
Rule 1: Every sale needs a reason
"20% off because our spring collection launches Friday" reads as news and a good reason. "20% off" alone reads as either not exciting or worse, desperation. So no sale ever runs without a reason a customer can understand: a new collection launching (the old one steps aside), a stocktake clearing the shelves, your shop's birthday, a seasonal sale.
Rule 2: Keep regular sales rare
Every discount comes straight out of the margin you protected in Stage 2, Step 3, so a sale is you ‘spending’ your marketing budget deliberately. But the direct cost is the smaller danger. The larger one is the training effect: run sales often enough and your customers learn your habit, and then they stop buying at full price and will always wait for a sale. A rhythm that works well for a handmade shop: big gifting season (like Black Friday) gets its headline event, and beyond that, about one modest, reason-backed sales in each season maximum. And usually I don’t run sales starting September to create a bigger event during Black Friday Cyber Monday.
Rule 3: Ladder your discounts
Regular sales stay a modest 10 to 15% discount, enough to move a fence-sitter without devaluing the work. But for big sale events like Black Friday, customers expect a bigger number. 20% or more as your margin allows. The difference matters because it preserves meaning: if your quiet March stocktake sale offers the same discount as your Black Friday, then Black Friday stops being special, and the one moment of the year when shoppers arrive expecting to spend loses its power in your shop.
Rule 4: A sale is a launch, so build the hype
A good habit to build is to hype up your sales. We will talk about it more in the next step but here’s a light version: A headline event gets the full treatment of three emails, four social posts, early sale access for the list. A modest regular sale gets a simpler version: an announcement email and a last-call email, a launch post and a last-call story.
Go deeper: The Customer Psychology Modules (urgency and scarcity that stay honest)
Until now, every part of your marketing has performed solo with just a single channel. This step is the big orchestra number where we put everything together: your shop, your email list, and your social media. This is the single highest-leverage skill in this stage, because you'll reuse it every holiday season for the life of your shop.
1. Pick the occasion
The year's gifting peaks are the obvious candidates, but a shop anniversary or a big collection launch works fine for a first run. Whatever you choose, start planning 3 to 4 weeks out, so you can everything ready for the sales launch.
2. Ready the shop
Set up the Etsy sale or coupon, funded, as always, by the margin you protected in Stage 2. Then choose the sale's stars deliberately, and there are two right answers: your bestsellers, because your Stage 3 data has already proven they convert and a discount simply widens a door shoppers were already walking through, and your gift section, the bundles and gift-ready listings, because occasion shoppers are exactly who promotion events attract. Refresh those chosen listings with seasonal long-tail keywords ("Christmas gift for plant mum" is a different search from "plant marker"), and make the gift details impossible to miss: a clear listing photo of your gift wrapping and the shipping deadline for on-time delivery are a must in gifting season, because "will it arrive gift wrapped and on time?" Will make or break the sale.
And before any of the marketing goes live, run the capacity maths, because a promotion sells whatever it sells, whether or not you can make it. Take your realistic making hours during the event window (realistic means the hours you'll actually have in a busy season, not a random guess), multiply by your pieces per hour, and compare that against an optimistic sales projection. If demand could outrun your hands, act now rather than apologise later: cap listing quantities honestly, publish a made-to-order cutoff date ("order by the 8th for Christmas delivery"), and let bestsellers sell out gracefully. Selling out is a good story to build hype for you in the future. On the other hand, missing December deliveries is a shop-damaging mistake that customers will remember.
3. The email plan: three email sequence
Your list is your revenue backbone in any promotion, and these three emails help you achieve your sales goal:
- The announcement. Early access first, especially if that's the promise your Stage 4 lead magnet made and this is you keeping it. In this email, talk about what's on sale, the details, and when it ends.
- The middle proof. 2-3 days after your announcement email, write a ‘proof’ email to further build trust: 5-star reviews over photos of the pieces they praise, a "these are already on their way to new homes" note, maybe the bestseller that's running low (honest scarcity only). A nudge that reads like news, not pressure.
- The last 24 hours. The final call, sent the day before it ends, tied to the real deadline and the real shipping cutoff. Plain subject line, one job: "Sale in 24 hours".
Batch all three in one sitting, in your brand voice, with your email-only code doing the revenue tracking.
4. The social plan: keep it simple
Your social media’s job in a promotion is support, not carrying the show, so resist the urge to over-produce. Four pieces of content is plenty: a teaser a few days out (sale is coming, a few teaser details with some product photos), the launch post when the sale opens to everyone, one mid-sale proof share (a review, a milestone, a packed-parcel photo, straight from your Stage 3 habit), and a last-call story on the final day with a countdown sticker. All four can be made in one batching session, and that's genuinely enough.
5. Measure it like you mean it
Keep and analyse all your data: Your email-only coupon code tracks the list's revenue; your Etsy stats show the traffic spike by source; your platform analytics show which post or story perform the best. After gathering the data, analyse which channel and style is your best performing, and then write the results down so that you can double down on what works for your next sale event.
Go deeper: Planning Your Busy Seasons (the full season, from October prep through to backup plans)
Toolbox: Promotion Event Planner · Holiday Promotion Post Templates
Traffic systems are judged in months. After 2 to 3 months of consistent execution, sit down with two dashboards, read honestly, and choose one of three verdicts.
First, let's read the numbers. In Etsy Stats, open your traffic sources: What share of visits now arrives from your channel? In your platform's analytics, find what actually drove those visits. For example, in your email marketing platform, see which email campaign drives the most clicks; On Instagram, see which post gets the most engagement and/or profile visits. A good number for this stage would be your external channel driving about 20% of shop visits.
Verdict one: Double down on content that works. There will be content that drives clicks to your shop, and there will be content that drives engagement and follows. Double down your effort on those two types of content. Go back to your Canva and mark down the designs used to make those type of content or move them to a separate folder. In the future, use those designs as your starting points. This is a similar analysis we used in Stage 3 for your Etsy ads: Double down on the winners.
Verdict two: Pivot content before channel. If the graph is flat after honestly consistent months of effort, don't just keep doing the same thing. It's time for a big change to shake things up. This matters most for the commonest flatline of all I see in sellers: An Instagram grid of plain product photos. If that's you, don't just change platform. Instead, change your content to become drastically more human: Put your face on camera talking through your process, make reels showcasing your crafting process, show a transformation from a sketch to a finished product, shoot a lifestyle video of the product being used in real-life scenarios. Run the new type of content for 3 to 4 weeks and read the analytics again.
Only if the channel itself looks like the mismatch, say, months of well-made keyword pins into a niche that just doesn't live on Pinterest, do you move the experiment across: Take your content and test them on another channel. And if you're changing from a channel that doesn't really have much engagement, you can use the same graphics and caption to save time.
Verdict three: add a second channel, rarely. Only consider this when the first channel brings in traffic and sales that justify the hours. For many sellers, opening a second channel doubles the time they use, which could lead to burn-out. An alternative is consider posting the same content to another channel automatically. For example, on Instagram, you can share the same post to both Instagram and Threads by just flipping a switch, without any extra work.
Toolbox: Weekly Stats Tracker
Which leaves exactly one move: making that officially true. Stage 6, Expand & De-Risk, is where you take the customer base, the brand, the traffic, and the systems, and give them a second home: your own website, a digital product line, wholesale, in-person selling, or whichever expansion fits the business you've become. Let's go make your shop something no single platform can take away.