Product photos can make a big difference for your click-through rate of your listings. It can also make your designs look more desirable, and therefore easier to sell.
For this, we will be using a tool called Artboard Studio to make mockup photos.
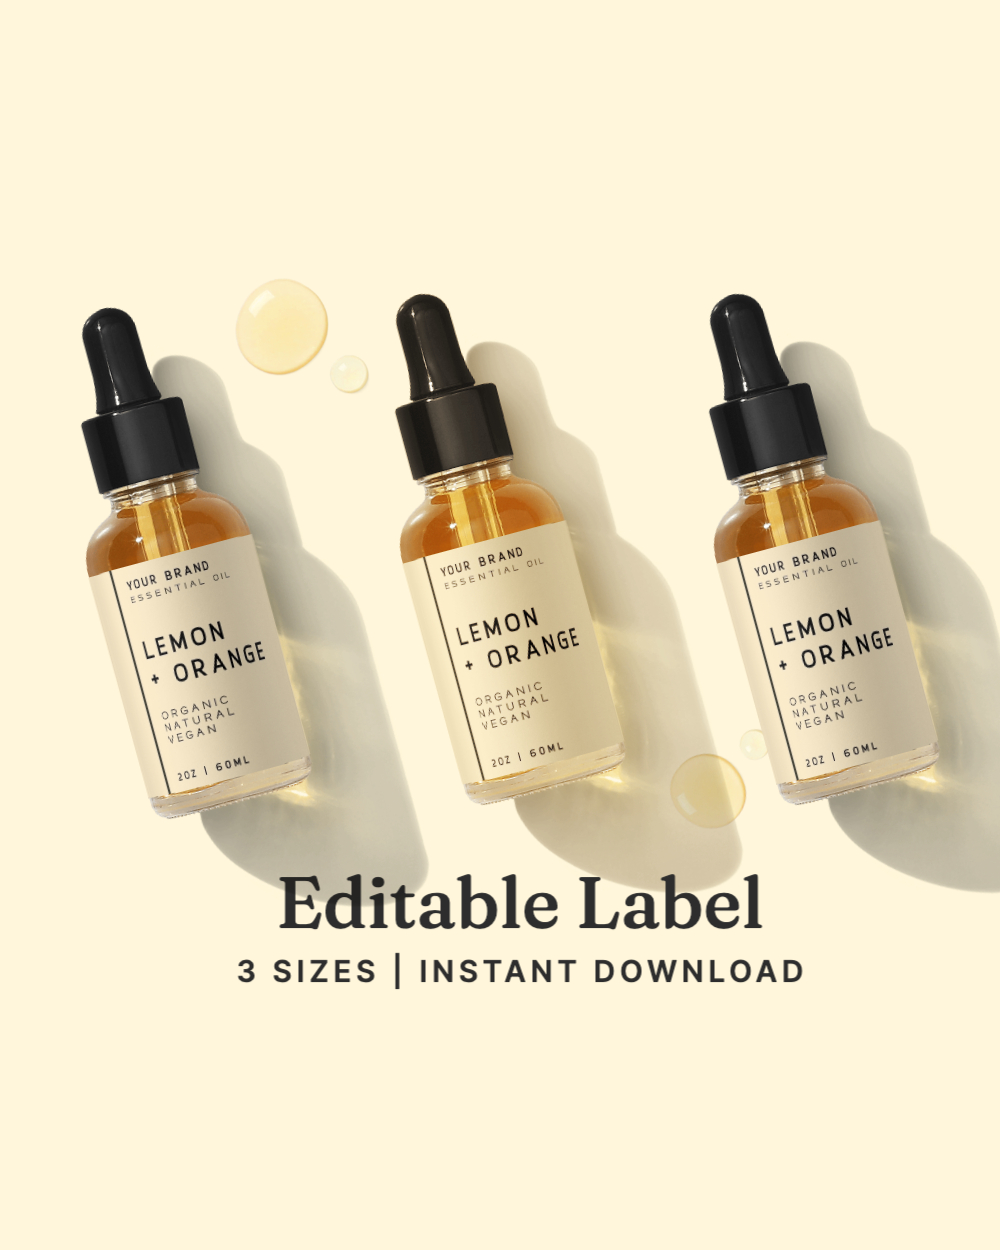
Using mockups is a great way to showcase your designs in a realistic setting, which allows customers to picture themselves using the design more easily. All without you having to print the design out to photograph on an actual product. Here is an example of my jar label design on a mockup photo using Artboard Studio:
The reason I use Artboard Studio is that it’s very easy to use. It’s a browser-based application which means I don’t need to install Photoshop. I can replace the design (like wall art, label, phone screen, etc) with my own with just a click. And I can also create any scene I want with their big library of elements. I know it sounds like a sales pitch but I genuinely recommend using it to create clickable product photos.
In general, I would recommend following the product photo style of the best selling products you identified in the previous step. In general, simple, clean, white/muted coloured background, with a clear focus on the product, do the best.
Choosing Template or Start Your Own
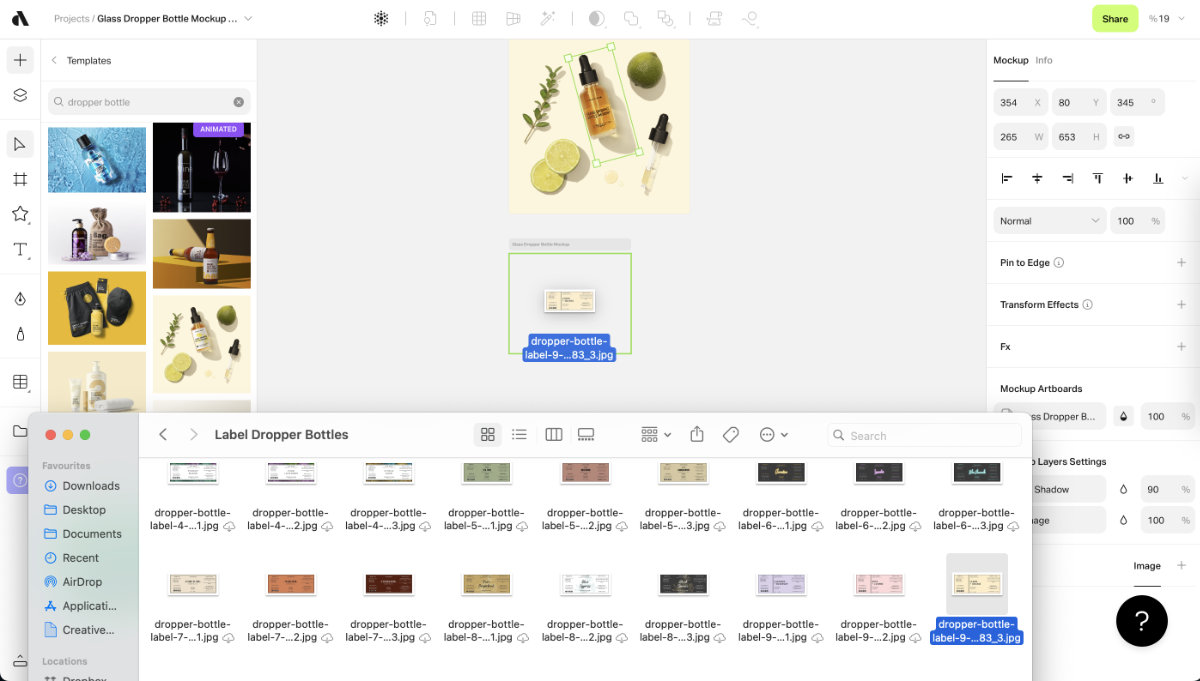
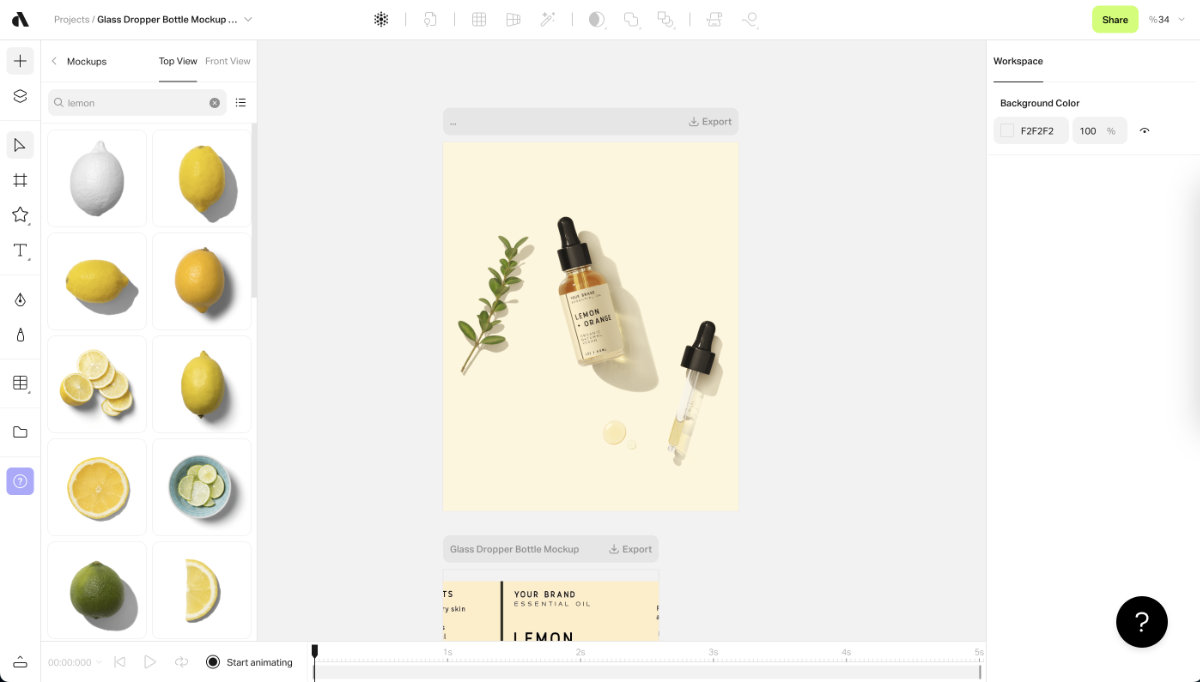
After you logged into Artboard Studio, either start by choosing a template or start from scratch. They have a good selection of pre-made designs that you can adjust. All the elements can be edited (move, change colour, adjust the size and more). You can also add/delete elements from templates. Let's start with this dropper bottle label template as an example:

Once you clicked on the design, it will appear as a new artboard in your workspace. And below that you can see the location where you can replace the design with your own design.

First, we will delete their original label design, and then drag in your own label design
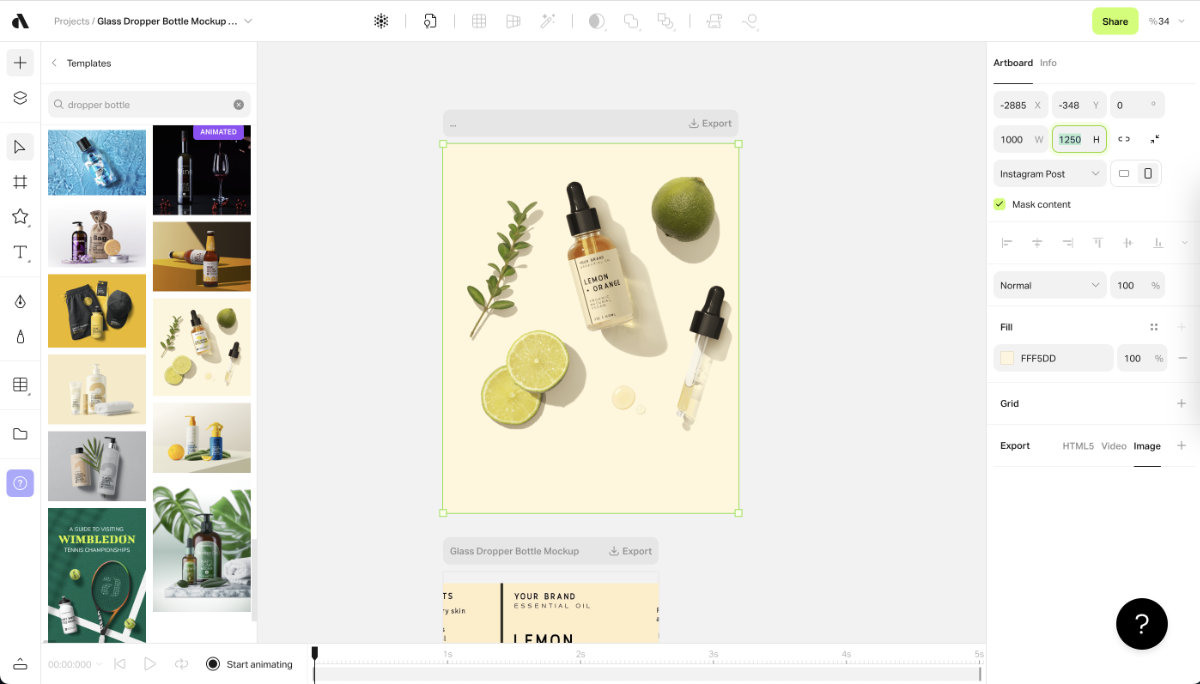
Now, resize the label by dragging the corner and adjust the placement until it looks right in the listing photo above.

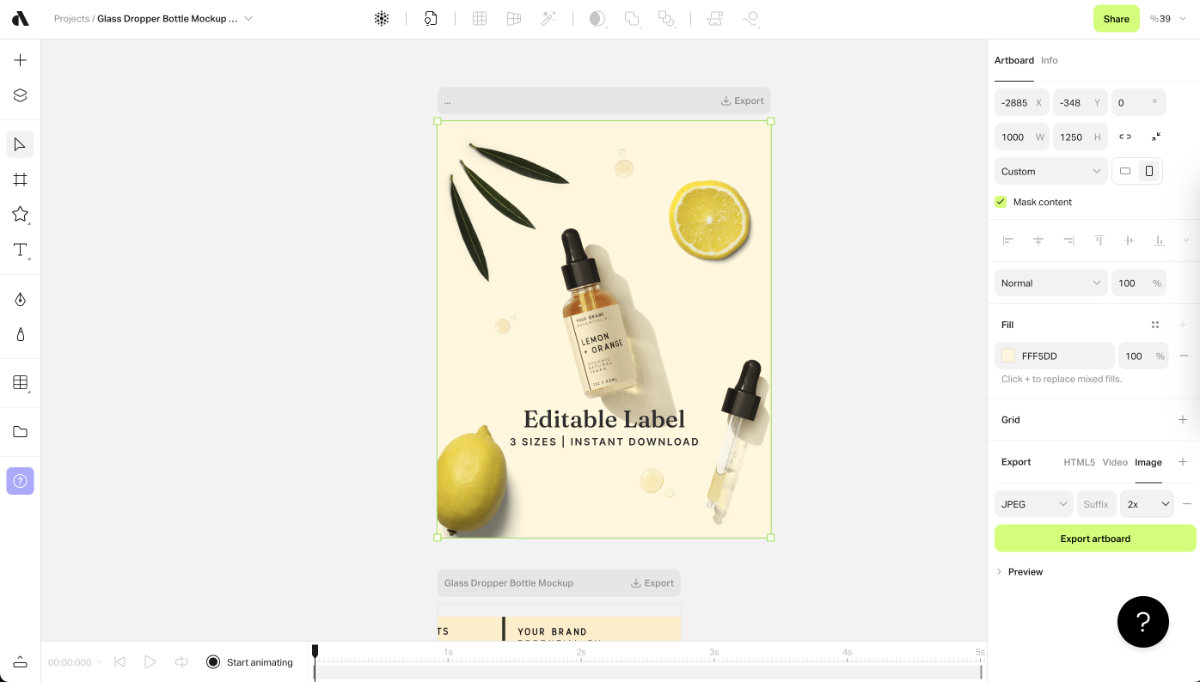
I prefer a listing photo that is 4 x 5 in aspect ratio, as I can use it in both on Etsy and on social media without resizing. To do that, click the artboard (by clicking the grey bar above the photo) and change the Width and Height. I chose 1000px width and 1250 height:
For a label design that says lemon and orange, having lime in the photo may be a bit weird. To replace the graphic, click the "+" symbol on the top left and then mockups. Search the graphics you'd like to find, in this case "lemon".
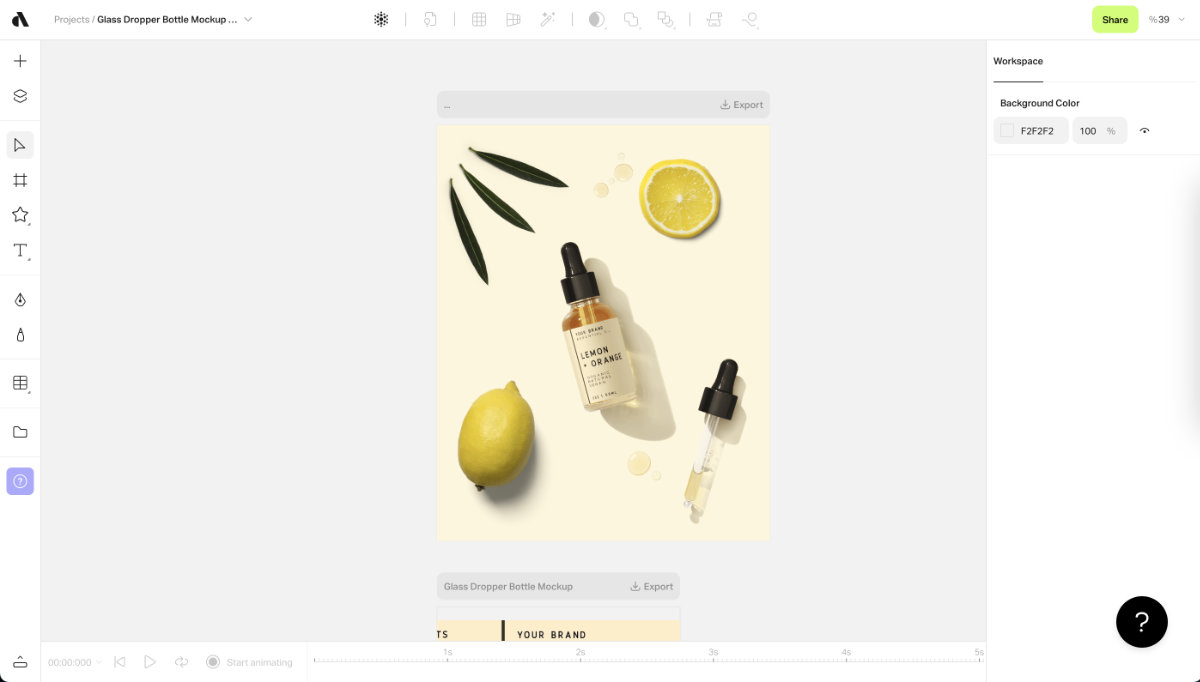
After replacing the grahpics you prefer, our example template looks something like this. You may want to resize and move elements around to make the photo more balanced.
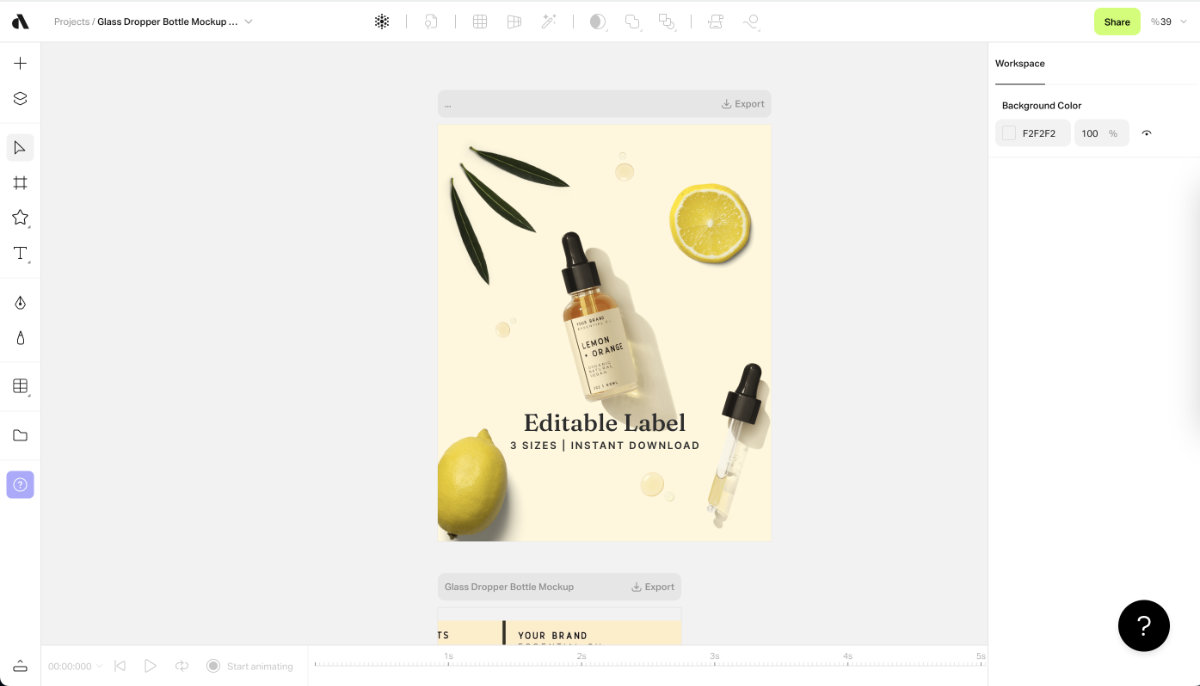
To add text to the photo, click the "T" symbol on the left and type in the text you'd like to add. I recommend adding your strongest product benefit as the main text and some supplementary information as smaller text below that. Change the font and size to fit your photo.
Finally, let's export the mockup photo to use it as the listing photo. Click the grey bar above the artboard where your photo is. Then on the right, click "+" symbol in the export section. Choose 2x so that the size of the photo will be double, which means in our example, the final size of the image will be 2000px wide x 2500px tall, which fits Etsy's recommendation of listing photo size.
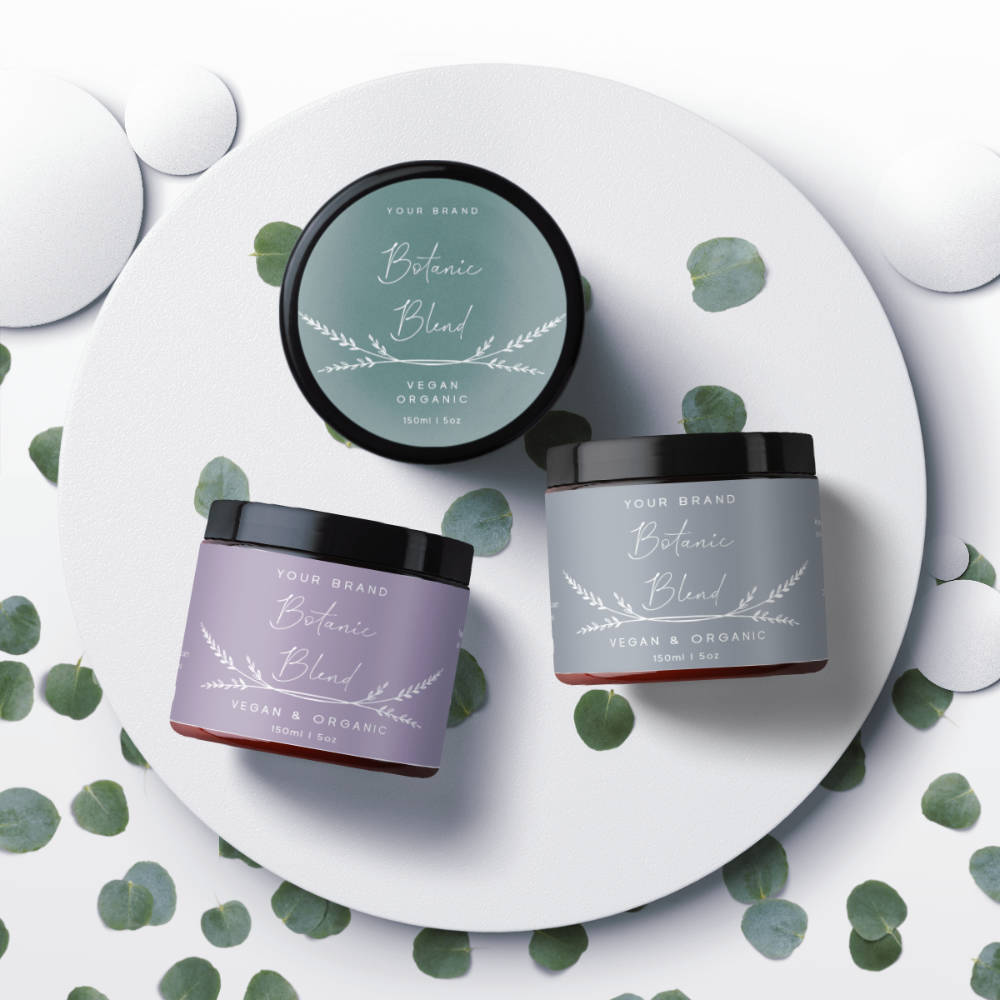
The above example illustrates the important features of Artboard Studio, but for your listing photo, you may or may not need to do all of that. Sometimes a simple photo could work just as well, and requires half the time for you to create. For example, I just duplicated the dropper bottle 3 times to get this listing photo:
Some Example Listing Photos
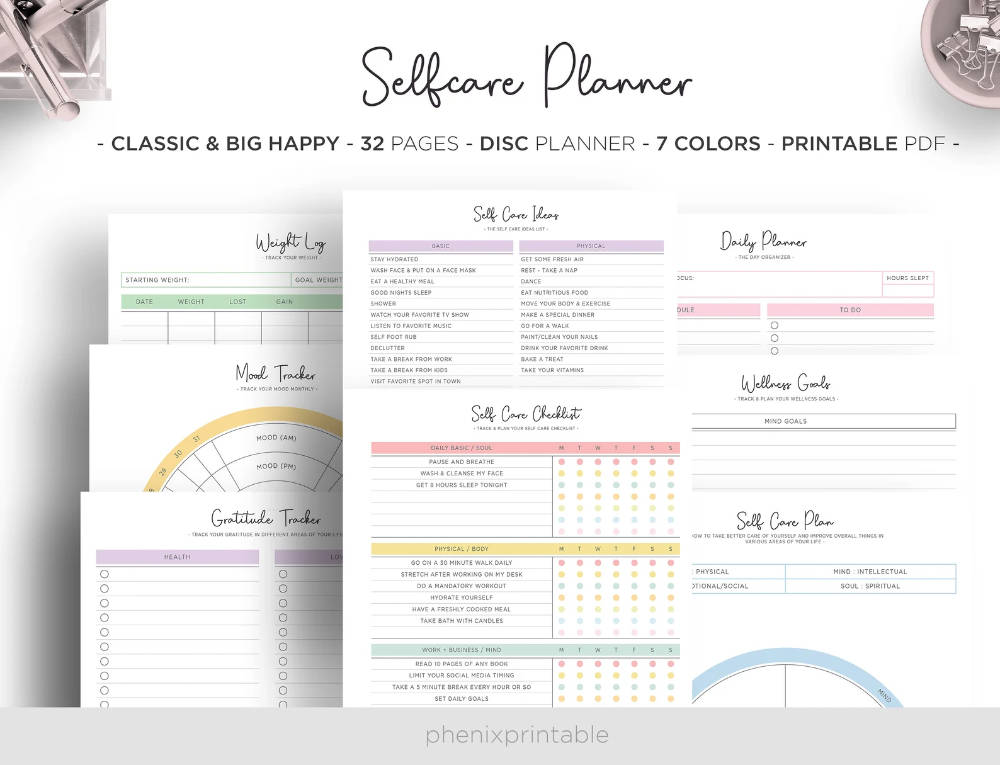
phenixprintable put the important information that customers are looking for as the thumbnail product photo:
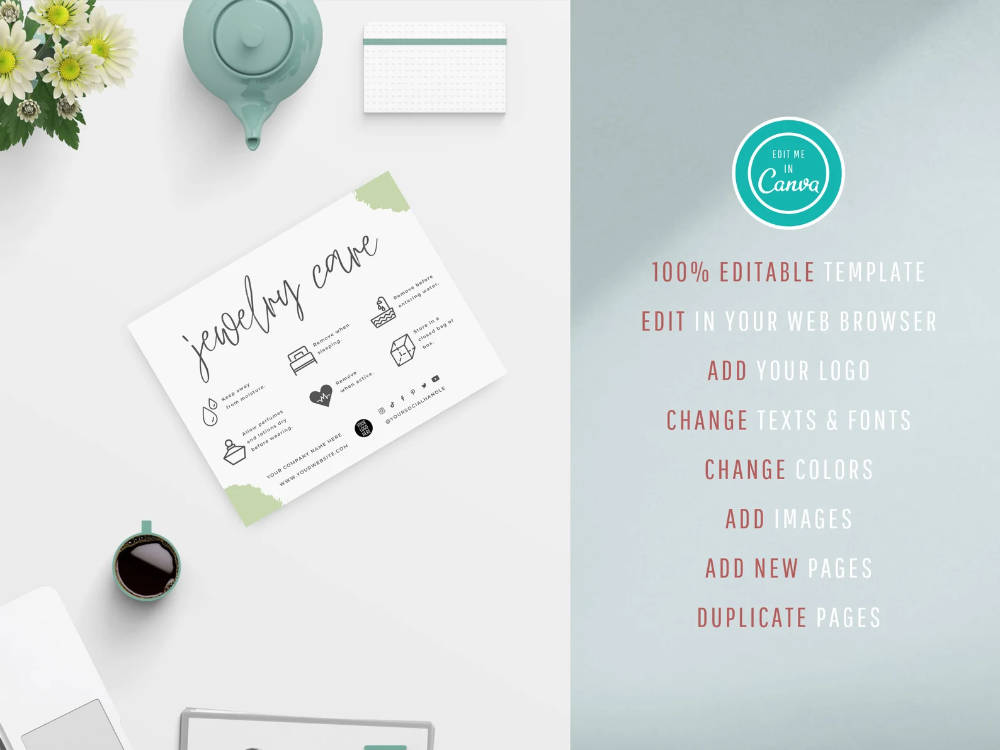
WigglyBrain lets shoppers know what can be edited and changed for their jewelry care card template.